With this article I want to share my personal experiences, which I gained during my several shootings of the night sky and the milky way. Therefore, this article is about the different camera settings, which will help you to capture the beautifulness of the night sky and especially of the milky way with its myriad’s of shining stars! If you are in particular interested in shooting the Northern Lights – the Aurora Borealis – you can find special advises in my article „How to photograph the Northern Lights“.
So the question raises: what are the important facts you should think of before planning your photo session at night?
Here are some points you should keep in mind:
- choose a place with as less light pollution as possible (here you can find a interactive map for the light pollution, or here another one)
- choose a time with descending moonphase or even better go at New Moon (The moonlight is often much stonger as the display of the stars or even of the milky way itself, check the moon phases or you can use this app)
- choose our place carefully (e.g. shooting in close distance to rivers or lakes can lead to condensation on your lens – one the other hand are reflections on lakes delightful)
Keeping this in mind, I would strongly recommend the following gear:
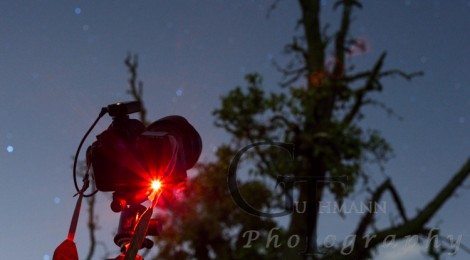
- a tripod is essential because of the long exposure times (e.g. Sirui travel tripod)
- wideangle lens (10 – 14 mm) or Fish Eye lens (I just have a 16 mm lense and in my opinion this is not optimal to image the whole night sky)
- optionally a remote controller
- flash or torch (to illuminate persons or objects in the foreground of the dark sky)
Which are the best camera settings for the perfect shot of the twinkling milky way?
First of all: get your camera and different settings known at daytime before you stand tired in the dark without knowing what exactly to do. Test the different settings for your lens and how to focus for infinity. It is often helpful to take testshots of the night sky. Always use the histogram function of your camera instead of just looking at the taken picture to judge if you have a good exposed image. Only the histogram will tell you the truth about under- or overexposed parts of your picture, which will hence be clipped off. Moreover, your eyes have already adapted for the dark and the light of the monitor is therefore way to strong for a qualified judgment.
I personally take my pictures only as RAW-files that means the pictures are not internally processed by the camera but also that the produced data volumne is much higher. Moreover, specialized software is needed for watching and/or editing of your pictures like, for example, Lightroom.
Camera Settings for nights sky photography of the stars and the milky way:
ISO: 2000
Aperture: 2,8 (or better – I only had lenses with 2,8)
Exposure time: 20 seconds
It is useful to save the above mentioned values as preset for your camera. In this way you can fast and easy access the settings, which can afterwarts slightly modified depending on the different situations. If you don’t have a remote controller it is the best to program a 2 second delay for your shot to prevent unsharp pictures through shaking while you press the camera button.
Last but not least: if anything is still unclear or if you still have unanswered questions concerning the night sky photography, feel free to leave a comment on my site or write me an email instead. Also I would be happy about your feedback or if you just share your stunning pictures with me.
PS.: If you are interested in more pictures of the night sky and the milky way you can find them here. Unfortunately the blog posts are written in german, but luckily pictures are multilingual!

Schreibe einen Kommentar